
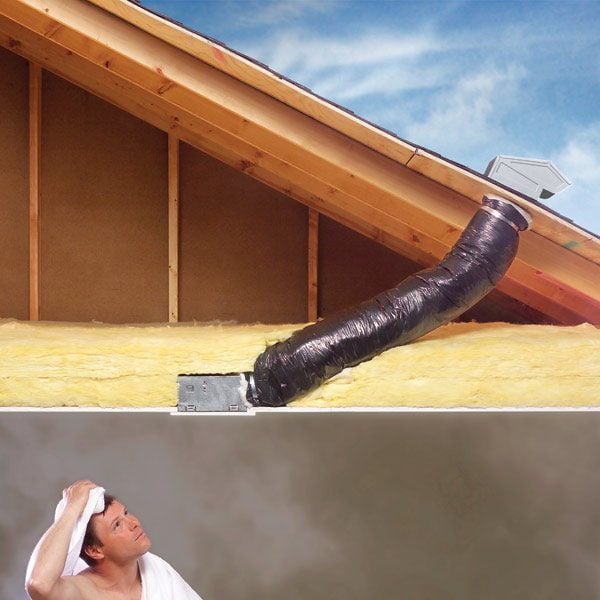
Fix your bath fan without replacing the entire unit and improve air flow with a first class vent system. You can replace a dead motor without tearing out the ceiling and replacing the whole thing. You can also improve venting and prevent roof rot by running the vent through the roof, and not leave it in the attic as was done by many contractors.
Both improvements are easy. This article shows you how.
Both improvements are easy. This article shows you how.
Replace a dead motor
« Previous Photo
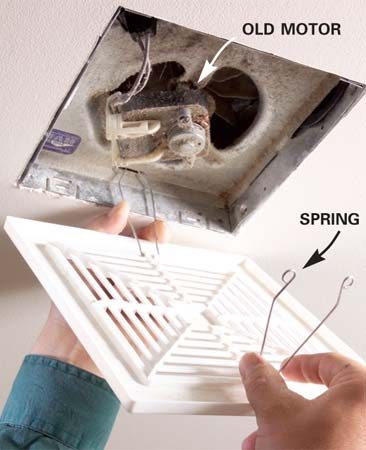
Next Photo » Your first step is to get the fan's model number. Remove the fan grille (Photo 1) and vacuum away the dust to find the number on a label or stamped on the fan’s housing. But don't order a new motor until you remove the old one. You might need other parts too.
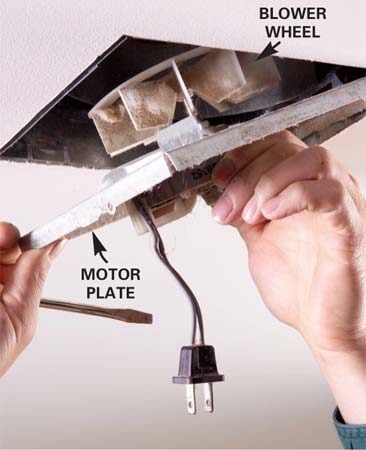
Bath fans vary in design, but motor replacement requires the same basic steps, no matter which brand or model you have. Turn off the power to the fan at the main breaker panel. Then unplug the fan and remove the motor plate (Photo 2). Some motor plates release by pressing or prying on the side of the fan housing. Others are secured with a screw or two.
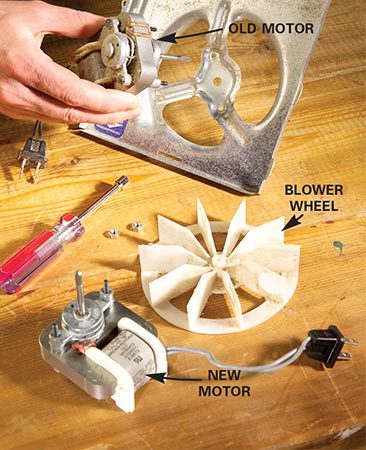
Before you can remove the motor from the plate, you have to get the blower off the motor's shaft. This is often the toughest part of the whole project. An older metal blower might be fastened with a screw. Plastic blowers usually aren't fastened at all, but simply slide off the shaft. Either way, removal may require some hard prying and pulling. If you wreck the blower while removing it, don't worry. You can order a replacement at little cost. To install the new motor, simply reverse the removal process.
Run duct outside to prevent roof rot
« Previous Photo
Next Photo » When there's an attic above the bathroom, some installers take a shortcut: Instead of running the duct through the roof, they end the duct inside the attic. The result is that the fan fills the attic with moist air. That moisture feeds wood rot. In winter, frost forms in the attic and as the frost melts, water can damage the ceilings below.
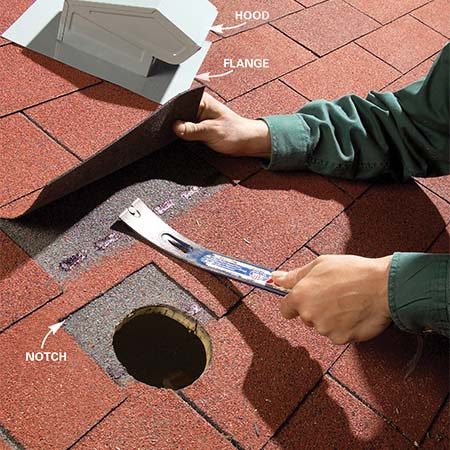
If you don't have a cap on your roof like the one shown in Photo 2, chances are your bath fan vents into the attic. Running a new duct up through the roof isn't a complex job, but you will have to work in the attic and on the roof. Since you're doing all that work anyway, consider replacing the fan.
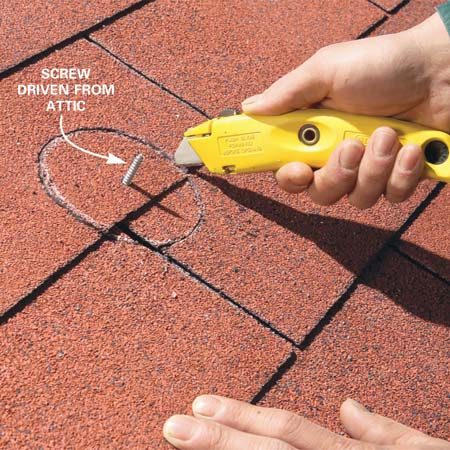
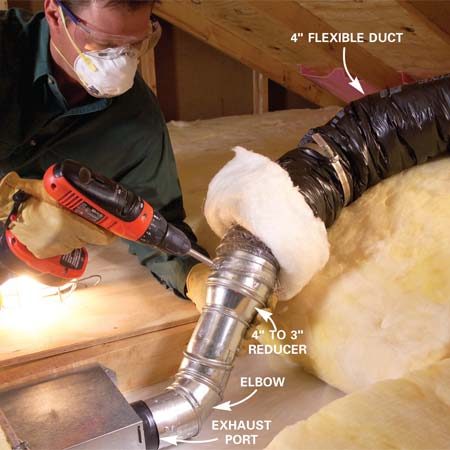
An attic can get dangerously hot in summer, so work on a cool day. Wear a dust mask and eye protection. Bring a trouble light and a large scrap of plywood to use as a work platform. Here's how to do the job with only two trips to the attic: On your first trip, measure the exhaust port diameter and pick a spot near the fan where you want the duct to exit the roof. Drive a screw up through the roof so you can find the location from outside. Then head over to http://www.storeforparts.com/
Here is what you need.
A roof vent cap.
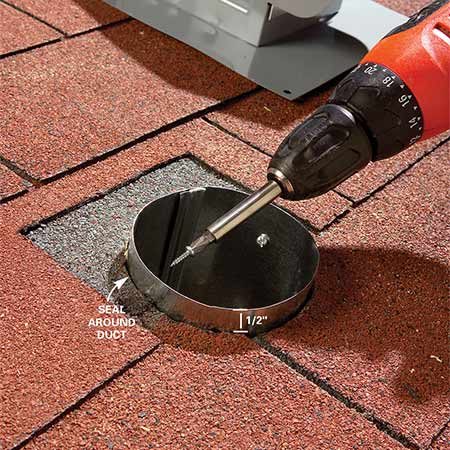
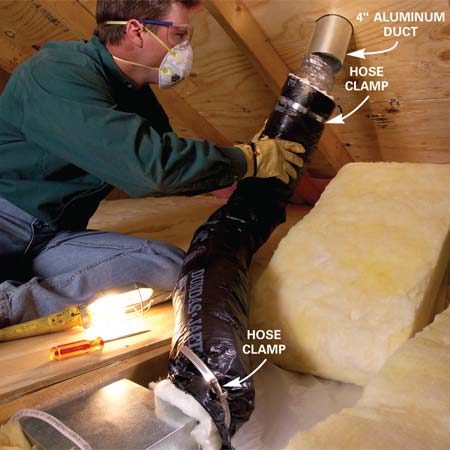
- Aluminum duct the same size as the flexible duct. You only need about 6 in., so buy the shortest section available and cut it with a metal snips.
- Two 6-in. hose clamps.
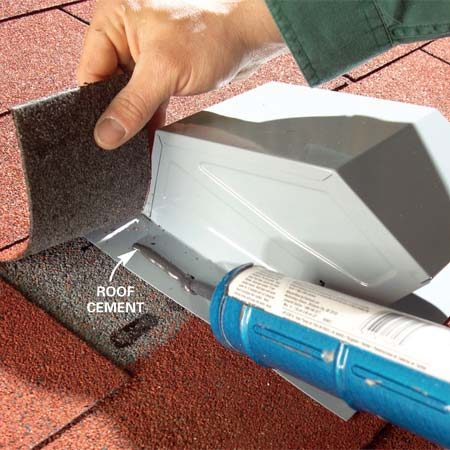
- One tube of roofing cement.
- Roofing nails and 1/2-in. sheet metal screws.
- Flexible, insulated duct. Insulation prevents condensation from forming on or inside the duct. Home centers often carry only 4-in. insulated duct. If your fan has a 3-in. port, you can still use 4-in. duct by attaching a 3-in. elbow and a 3 x 4-in. reducer with sheet metal screws as shown in Photo 5.
This implies you will appreciate both extraction and lighting in only one unit, helping you spare space and exertion. The bundle additionally contains ducting, an outside flame broil, and an in-line fan. The main conceivable drawback of this item is its vitality productivity, since it accompanies an in-fabricated light that devours more power than other extractor fans without lighting. If you want to know more, Please check out here: http://bathroomventilation.net
ReplyDeleteIt is a proficient article that you have shared here. I got some unique and valuable information from your article. Thankful to you for sharing this article here. dryer vent cleaning chicago
ReplyDeleteI found one successful example of this truth through this blog. I am going to use such information now. Removalist Geelong
ReplyDeleteYou took great care when writing this post. The amount of knowledge is astounding, and the post is also beneficial to us. Breaker Panel Replacement South Florida Please continue to distribute articles of similar nature.
ReplyDeleteIt is a proficient blog that you have shared here about home renovation services London I got some unique and valuable information from your blog. Thankful to you for sharing this blog here.
ReplyDelete