Saturday, October 5, 2013

Replacing Your Bathroom Fan

Why Replace It?


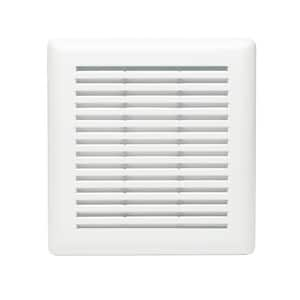
Nutone 765HFL available at HomeProductsInc
There are many reasons you may have to want to replace your Bathroom Fan.  Your current fan may have broken, it may be too loud, or maybe you have just remodeled your bathroom and the old one just doesn't fit with the rest of your decor anymore.  Whatever the reason, it is important to remember that replacing your Bathroom Fan is not as hard as you might think.  In fact it can be done in a few simple steps.

How to Replace It


By following these simple steps you will be able to save yourself the money it would cost to have someone else come do it for you.

1. Before buying a new Bathroom Fan, be sure to know the measurements required for your new fan.

2. For safety, be sure to turn off the power leading to the Bathroom Fan.

3. Remove the blower assembly from the housing, using a screwdriver to disengage the tabs.

4. Remove the wire paneling screw and remove the wire panel.

5. Installing the Mounting Frame:  Put the mounting frame through the opening in your ceiling, secure one side with screws.

6.  Installing the Housing:  Pull wire through, into the housing, and finish inserting the housing into the opening and secure with screws.

7. Pull ducting into the housing and attach the duct connector to the ducting.  Secure with screws.

8. Attach the clamp to the knockout plate, pull wire through, and put knockout plate in place in the housing.(secure with screw)

9. Connect the color coded wires (refer to wiring guide in installation packet). Slide wiring panel into position and secure with screw.  Plug in motor control.

10. Finally you are going to put the blower into the housing (which you will secure with screws) plug the motor in and insert the grille springs into the housing. Your done! Enjoy your new Bathroom Fan.

If you are more of a visual learner, Braon-NuTone has a great video explaining how to do all of this at http://youtu.be/xYa3y7OSnMY

If you do not need a completely new Bathroom Fan, but need to fix it, go to storeforparts.com

Friday, September 27, 2013

Replacing Your Range Hood Filters


30 Inch Stainless Steel Chimney Range Hood. Buy now at Home Products Inc.

Why Replace the Filter?

One of the many modern conveniences we take for granted is the Range Hood.  Range Hoods keep the air in your kitchen clean (which keeps the kitchen itself cleaner), gets rid of excess heat, and can even improve the resale value of your house.  Because they are large, difficult to install, and can be expensive, we at Store For Parts believe that maintenance is key to keeping your current Range Hood working for years to come and saving you time, money, and hassle along the way.  We recommend cleaning your Range Hood regularly and changing the filters every 6 to 12 months.

Which Filter for Me?

Rectangle Charcoal Filter


There are many different types of filters you can buy for your Range Hood.  There are Rectangle Filters, Round Filters, Dome Filters, Basket Filters, and Filters with Light Lenses.

You also want to take into consideration which type of Filter to use.  In ductless Range Hoods, the air is sucked through the fan, through the filter, and back into the room.  There are two types of filter to concider.  The first is a charcoal filter.  Charcoal filters perform better at removing oils, odor, and smoke from the air, but they are hard to clean so you must replace them more often.  The second is an aluminum filter.  Aluminum filters are less effective at removing oils, odor, and smoke from the air, but are fairly easy to clean which means you can go longer between new filters as long as you regularly clean them.
Aluminum Filter with Lens

Before buying new filters, make sure to check which style and size of filter your Range Hood uses.  The easiest way to do so would be to check the model number of your Range Hood, which can usually be found on the underside of the Hood, and go to storeforparts.com to find the best filter for you!

 For new Range Hoods and a variety of other home products, go to homeproductsinc.com

Tuesday, June 25, 2013

NuTone Replacement Grille for NuTone 695 and 696N

NuTone Replacement Grille for NuTone 695 and 696NZoom

NuTone Replacement Grille for NuTone 695 and 696N


PRODUCT DESCRIPTION

The NuTone Replacement Grille for NuTone 695 and 696N is finished in white for an elegant appearance that will complement any decor. This part can work as a replacement grille for exhaust fans. It is compatible with the NuTone 695 and 696N fans that feature an 8 in. x 7-1/4 in. housing.

  • White grille
  • Works as a replacement grille for exhaust fans
  • Compatible with the NuTone 695 and 696N
  • For use with 8 in. x 7-1/4 in. housing
  • MFG Brand Name : NuTone
  • MFG Model # : C350GN
  • MFG Part # : C350GN
  • Includes spring clips

Thursday, May 30, 2013

Broan 353s. Get em' while its hot.

Did you know?


Modern building codes require unoccupied attics to be ventilated to reduce the accumulation of heat and moisture that contribute to mold growth and decay of wood rafters and ceiling joists. One common code requirement is that the total area of attic vents be equal to or greater than 1/150 of the floor area of the attic, with 50% or more of the vent area located in the upper portion of the attic. Various types of turbine ventilators and exhaust fans can also be used to assist with attic ventilation and decrease the required area of passive ventilators.

Keeping your attic cool is critical to keeping your house cool. That is a fact. However, keeping your attic cool is easier said than done. Heat from the attic will find a way into your house like clockwork. Creeping into your insulation and living space, attic heat will make your A/C run longer and harder for extended periods of time. Properly vented attics save money, add longer life to your roof, and removing toxic and damaging molds. During the summer, attics can reach staggering high temperatures (like in the 150 degree range staggering) So what do you do?

Grab a Broan 353 Attic Fan. The high performance and low cost has moved it to our best selling summer product so far. Bonus points - the Broan 353 has scored a total of 0 complaints from our customers. While solar powered fans have trouble with mother nature, these don't rely on the sun to run. The simplicity and cost of the 353 is top shelf. So find out how much you could be saving by properly ventilating this summer. Click the links below to get started. 


Wednesday, April 24, 2013

DIY Summer Projects you can do with us!

1 - Add a new doorbell. Don't you want the device that signals you have a visitor to be a little classier?
     Of course you do. Take a look.
Much better, right? Of course! Visit our dedicated page here and prepare to be blown away at the vast selection that is on the market. (seriously)

2 - Install a solar attic fan. Solar attic fans are a tad pricey up-front. But you will be shocked to learn they cost $0.00 to operate. Its powered by the sun! Most of them even come equipped with an automatic thermostat that will  turn on the fan when the attic reaches a certain temperature. Keep cool for free


3. Clean or replace your old Nutone 391 bags. Seriously I cannot even begin to tell you how many of you love buying these (and we love selling them) but for the first month a bag is in a simple clean should suffice. After that, yeah you should definitely change it.

Thursday, April 11, 2013

Discount offers from StoreForParts.com 0696B000

As we go forward with a full head of steam deep into the year. We have set a lofty goal to become the premier destination for Broan-Nutone parts shopping. We are currently undertaking the task of getting detail detailed pictures of all motor and heat assemblies. Better pictures = better idea of what you need and greatly minimizes the risk of incorrect orders from you (our beloved customers) and us (valiant parts supplier.) To better be of service we humbly ask for you to fill out a questionnaire regarding all returned products. We have also established ourselves deeply onto eBay.com and Amazon.com to offer more shopping options to our customers. We have also started 2 promotions that will run until the end of the year. Return customers can reference their order number to receive an additional discount over the phone, and followers on our twitter, be sure to check often as we plan on having daily firesales on select parts. Readers of this blog can call and reference this blog for a 1 time discount of 5% off our best selling 0696B000 (seen below) and a discounted shipping rate of $9.00 even to the lower 48 states only. Sorry Hawaii its 13.00 to ship there. No more, no less. Thank you for following StoreForParts.com and we hope you are just as excited for the future as we are!


Regards,
StoreForParts.com

Thursday, February 21, 2013

0696B000 or 8632000

To motor only, or to buy the assembly. That is the question. Well, here is the answer. We very much so recommend the 0696B000 as opposed to buying just the motor only 86322000. Why is that? Many reasons actually. Believe it or not, the entire assembly is much easier to install than just the motor only.The 0696B000 assembly is quieter and far more reliable than the motor only. The highly highly popular QT110s and QT100s were installed everywhere and more often than not need a replacement motor regularly. If you are needed a new motor, buying the assembly will save you money in the long run. I cannot stress that enough. Also grab a new grille for your older QT fan by clicking the link---> here <---
So if you're on the hunt for a new motor, grab the assembly instead. Your bathroom and its guests will thank you.

The assembly works with the following NuTone/Broan models:
QT100FL
QT100L
QT100LH
QT100LHM
QT100LM
QT110
QT110H
QT110NB
QT110N
QT100H
QT9093WH
QT9093AB
QT9093CH
QT9093BR
QT9093

Friday, February 8, 2013

Choosing an electrician.

Hello! Many of you have ordered parts but often pondered - "now how in the heck am I supposed to install this?" And that is more than okay. To be fair, 97% of us lack knowledge on an intercoms, bathroom fans, and central vacuums. So you plan to hire an electrician, but cant figure out whats fair and not in the world of hiring help. Here are some tips to help you find a quality hand to enter your home and offer aid.

Keep in mind there are many different contractors out there that have varied experience and knowledge so be sure to ask and ask again to make sure everyone is on the same page. Google will undoubtedly be your best friend here. Look for a website, yelp reviews, or anything else you can unearth on said contractor. If your man has wronged someone in the past, then there most certainly will be information regarding it. Always compare estimates for the job so you get a ballpark figure of what your going to be spending. Get an early sense of your electricians grasp of what exactly he knows, as many can bluff their way to getting knee deep into something they know nothing about. Ask someone who has used him before. Even in this age of having an abundance of knowledge at our fingertips, word of mouth is still a powerful tool.

So there you have it. Make sure to review everything before hiring help! It could save you from quick and painless to tiresome and frustrating. Hope this helps! Good luck DIYers.


Sunday, January 20, 2013

StoreForParts Tip of The Week - Bathroom Fan Maintenance.

Bathroom Fan Maintenance, an oft-overlooked project until its too late. For those of you with extra time on your hands, here is a quick 30 minute project to ensure years of trouble-free operation with your bathroom fan.

Built up dirt in your bathroom fan can strain the motor leading to its eventual demise. For a quick solution, turn off the power to your Bathroom Fan and simply remove the grille. From there, if possible, you can carefully brush off excess dust on the motor and fan blade. If it is impossible, unplug and unscrew the motor from the mount it sits on and take it down. It is also recommended to add oil where the shaft and motor meet on each side of the motor. Doing this will help your motor run smoother and quieter. Place the motor back into the fan and screw it back on the mount and voila! One clean and quieter motor.

Be sure to check back on our blog and twitter feed for everything DIY!