Tuesday, March 29, 2011

If your trash compactor's motor is working but the machine won't flatten your trash, you could have a broken or stretched drive chain or drive belt. Tightening the belt or replacing it is a snap.

Instructions


WHAT YOU'LL NEED


  • Replacement Drive Belt Or Drive Chain
  • Nut Driver And Socket
  • Screwdriver
  • Socket Wrench And Socket
  1. Unscrew the compactor from your kitchen counter, using a screwdriver. 
  2. Lay the unit on its side and locate the drive chain or belt. It will be under a cover plate on the top or bottom of the machine.
  3. Remove the cover plate, using a nut driver and socket. You'll see the drive gear, one or more power screw sprockets, and a drive chain or drive belt.
  4. Inspect the chain or belt. If it appears slack, you just need to increase the tension as explained in step 
  5.  If it's broken, buy a replacement at an appliance store, then go on to step 6

    Loosen the motor mount bolts, using a socket wrench and socket (see A). Then push the mount toward the power screw sprocket(s). This will make it easier to fit the new chain or belt in place.


  6. Slip the chain or belt over the sprockets (see B). On trash compactors with two power screws, you may have to unbolt the power screws from the frame and slide them out of the unit a bit to install the chain or belt.
  7. Push the motor mount away from the power screw sprocket(s) to increase the tension on the drive chain or belt. Tighten the motor mount bolts and check the tension. You should have no more than 1/2 inch (12 mm) of flex. Loosen the bolts and increase the tension again if necessary.
  8. Reinstall the cover plate, and screw the compactor to the counter.

Friday, March 25, 2011

How to Clean a Range Hood


How to Clean a Range Hood Filter


Avoid household fire hazards, and keep your range hood and fan doing what they are supposed to do! Cleaning your range hood is an important part of kitchen cleanup!

Instructions


things you'll need:


  • tri-sodium phosphate
  • Stiff wire brush
  • rubber gloves
  • soaking bucket
  • cleaning rags

  1. Remove the fan filter from the range hood fan. You can also remove any light covers, knobs, etc. that need to be cleaned.
  2. Fill a bucket or some other container with enough hot or boiling water to cover the filter (and/or other parts), when placed inside.
  3. Put on your rubber gloves and add the recommended amount of tri-sodium phosphate to the water. Mix and place the fan filter in the bucket with the mixture. Let soak for about 1 hour.
  4. After soaking, remove the dirt and grease from the filter by scrubbing with a stiff wire or other type of sturdy brush.
  5. Prepare additional cleaning solution with the tri-sodium phosphate and water. Use your cleaning rags and the brush to wash the range hood thoroughly. The tri-sodium phosphate will cut the grease and make cleaning a breeze
  6. Rinse and dry all cleaned surfaces, and replace the range fan filters and parts.

Thursday, March 24, 2011

How To Replace a Bathroom Grille


In this video clip we will be replacing a bath fan grill. In this bathroom we have a ventilation fan located on the ceiling. Now there's an old 1980's yellow colored grill covering this fan. In addition to it being old and yellow there is a lot of dust and other types of debris that have collected in it over the years. We're going to be replacing this with a new clean grill. Our first step is to pull the grill straight down. It's attached by springs and you'll pull down and you'll be able to pivot it. Next we will need to disconnect our spring. There's a spring on both sides so make sure you take both of those off. After that we need to vacuum out our fan unit. After that we can put our new grill in place and push it straight up. That one looks much better than the old one and it should function a lot better because we did vacuum that out as well.


Monday, March 21, 2011

How to Repair a Door Chime
Repair a Door Chime
 

If your door chime no longer provides the familiar tones and merely hums or buzzes, you can probably fix it without too much trouble. Try this before replacing it.

Steps
1
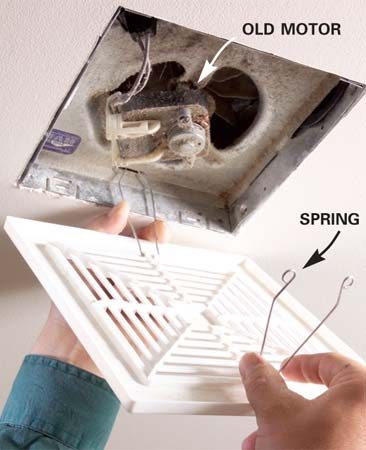
Remove the cover of the chime unit. Many times this cover will just hang on some tabs and can be removed by lifting it straight up. Other types may require that screws be loosened or removed.
2
Look for obviously broken or missing parts. Reinstall if possible. Springs and plungers are basically the only moving parts for electro-mechanical chime units.
3
Tighten electrical terminal screws. Most units operate at 24 volts or less, and should not pose a shock hazard. You can determine this by looking at the wires. If the wires look to be closer in size to telephone wire - or low voltage thermostat wire, it is most likely the 24 volt (or less) type. Low voltage door bell circuits usually originate at a small 120 volt to 24 volt (may be any value between 12 and 24 volts) transformer connected to the side of electrical panel. The presence of a transformer is also a good indication, too. In any case, treating the wiring as if it was line voltage (120 volts) will help prevent getting hurt.
4
Listen carefully and then observe the moving parts while an assistant presses the door bell button several times. A faint buzzing sound or slight movement confirms that the chime unit is getting powered.
5
Check and tighten the electrical points (fuses and circuit breakers, terminal screws of the door bell button(s), and transformer) if unable to hear or see the indications above and try again. If still unable to hear or see the indications above, just continue following the steps below.
6
Check the plunger for freedom of movement. Gently push / pull the plunger(s). It may move only in one direction, but may move in both. If unable to move the plunger, or it moves but does not "spring back" into position, it is likely hanging up on dirt, dust, etc.
7
Clean the moving parts of the chime unit. Do not use any kind of lubricant. No oil, no WD-40, no graphite powder, and no silicon spray. These may work for a short time, but will quickly attract dust and grime and gum up the plungers.
8
Cleaning can be done in place or removed from the wall. Either way will require safeguarding the area from dirt, solvents, etc. If removing from wall, label the wires and terminals before disconnecting.
9
Spray a short blast of electrical contact cleaner at the moving parts. Do not be surprised to see dirty contact cleaner dripping out of the mechanism. Attempt to move the plunger again. Continue to spray bursts while moving the plunger. The idea is to flush out any dirt, etc that has collected around the metal plunger body.
10
Once the plunger is able to move freely, the chime unit is ready to be reconnected and tested by pressing the door bell button.
11
Compare the voltage rating of the chime (likely 12 to 24 volts) with the rated voltage output stamped on the transformer. These values must match. Replace either the chime or transformer so that the two have matching voltage values. Most doorbell transformers are marked with AC voltage, but also have a 25 VA (watts) rating -- do not confuse VA with AC volts.
12
Remove wires from door bell buttons and touch wires together. If chime works, replace door bell buttons.

Tuesday, March 15, 2011

How to Repair a Range Hood


HOW TO REPAIR A RANGE HOOD

A range hood that doesn't adequately remove smoke and smells from your kitchen is usually suffering from one of a few common problems: The grease filter or some part of the exhaust ductwork may be clogged, or the fan may be bad. Neither of these repairs should take you much time.
Instructions

Unclogging the exhaust system
1
Remove the grease filter by sliding it out of its clips.
2
Submerge the filter in a plastic pan filled with hot, soapy water and 1/2 cup (4 fl oz/125 ml) ammonia. Let it soak for at least 15 minutes. If it's still dirty, soak it again, then rinse it thoroughly and set it aside to dry.
3
Remove the exhaust fan. Unplug the fan, then use a screwdriver or a nut driver and socket to take out the screws that attach it to the hood.
4
Clean the fan blades with an old toothbrush dipped into the ammonia-water mixture (see Warning).
5
Clean the inside of the exhaust ductwork, using a plumber's snake with a heavy rag tied around the end. Push the snake through the ductwork. Soak the rag in the ammonia and water mixture, then run it through the ductwork. Rinse out the rag and repeat the operation until the duct appears to be clean.
6
Clean the exhaust hood that's attached to the outside of your house. Use the old toothbrush and the ammonia-water mixture to loosen the grit and grime around the flapper plate. Make sure the plate moves freely when you're done. If it sticks closed, it can prevent the exhaust hood from working.
7
Reinstall the grease filter.

Friday, March 11, 2011

Repairing your Bathroom Fan. Easier than you think!

How to Repair a Bathroom Fan
Fix your bath fan without replacing the entire unit and improve air flow with a first class vent system. You can replace a dead motor without tearing out the ceiling and replacing the whole thing. You can also improve venting and prevent roof rot by running the vent through the roof, and not leave it in the attic as was done by many contractors.
Both improvements are easy. This article shows you how.
Replace a dead motor
If your bathroom fan is dead, here's some good news: You don't have to tear out the entire unit. Even if you fan is decades old, chances are you can get a replacement motor. Although a new motor costs about the same as a new fan, replacement saves time and trouble. You don't have to cut into the ceiling, crawl around your attic or get up on your roof. It usually takes less than an hour.
Your first step is to get the fan's model number. Remove the fan grille (Photo 1) and vacuum away the dust to find the number on a label or stamped on the fan’s housing. But don't order a new motor until you remove the old one. You might need other parts too.
Bath fans vary in design, but motor replacement requires the same basic steps, no matter which brand or model you have. Turn off the power to the fan at the main breaker panel. Then unplug the fan and remove the motor plate (Photo 2). Some motor plates release by pressing or prying on the side of the fan housing. Others are secured with a screw or two.
Before you can remove the motor from the plate, you have to get the blower off the motor's shaft. This is often the toughest part of the whole project. An older metal blower might be fastened with a screw. Plastic blowers usually aren't fastened at all, but simply slide off the shaft. Either way, removal may require some hard prying and pulling. If you wreck the blower while removing it, don't worry. You can order a replacement at little cost. To install the new motor, simply reverse the removal process.

Run duct outside to prevent roof rot

When there's an attic above the bathroom, some installers take a shortcut: Instead of running the duct through the roof, they end the duct inside the attic. The result is that the fan fills the attic with moist air. That moisture feeds wood rot. In winter, frost forms in the attic and as the frost melts, water can damage the ceilings below.
If you don't have a cap on your roof like the one shown in Photo 2, chances are your bath fan vents into the attic. Running a new duct up through the roof isn't a complex job, but you will have to work in the attic and on the roof. Since you're doing all that work anyway, consider replacing the fan.
An attic can get dangerously hot in summer, so work on a cool day. Wear a dust mask and eye protection. Bring a trouble light and a large scrap of plywood to use as a work platform. Here's how to do the job with only two trips to the attic: On your first trip, measure the exhaust port diameter and pick a spot near the fan where you want the duct to exit the roof. Drive a screw up through the roof so you can find the location from outside. Then head over to http://www.storeforparts.com/ 

Here is what you need.

A roof vent cap.
  • Aluminum duct the same size as the flexible duct. You only need about 6 in., so buy the shortest section available and cut it with a metal snips.
  • Two 6-in. hose clamps.
  • One tube of roofing cement.
  • Roofing nails and 1/2-in. sheet metal screws.
  • Flexible, insulated duct. Insulation prevents condensation from forming on or inside the duct. Home centers often carry only 4-in. insulated duct. If your fan has a 3-in. port, you can still use 4-in. duct by attaching a 3-in. elbow and a 3 x 4-in. reducer with sheet metal screws as shown in Photo 5.
Install the roof vent cap as shown in Photos 1 – 4. Photos 5 and 6 show how to finish the job in the attic.